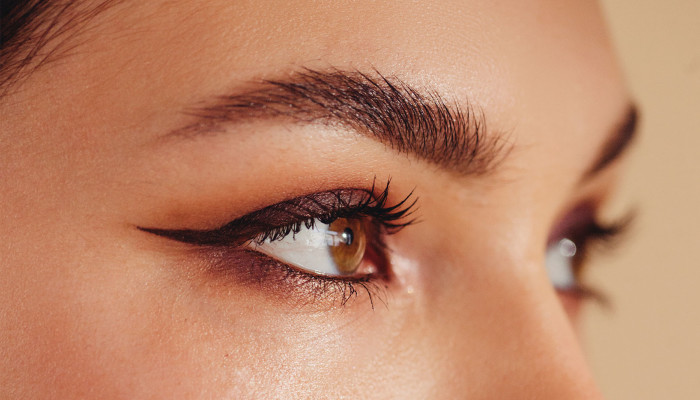
Whether you are talking makeup looks that never go out of date, the smokey eye truly is a classic. It is sexy, blending and fits everything, night out and formal. The good thing is? A person can learn this classic style with the correct products and using a bit of practice. In this tutorial we will take you step by step to create a smokey eye look that will always work, regardless of your level of expertise.

Step 1: Preparing your eyes
A perfect smokey eye begins with the proper base. When you put shadow directly over naked lids, you increase the chances of crinkling and/or yellowing over the course of the day.
Put on an eye base all over your lids to make the colour last long.
Assuming that you do not have primer, a small amount of concealer and then dusted with transparent powder will work just as well.
The step does more than give your face a smooth surface as it also enhances your eyeshadow to blend in flawlessly.
Pro tip: Never apply your foundation without applying your eye shadow first or you can end up ruining your base with fall out.
Step 2: Select the Appropriate Colours
The traditional smokey eye is layered with a range of color- light to dark. Not necessarily black or grey, amoxil as shades of brown, bronze, plums, or even deep green can make some gorgeous smokey effects.
To have a classic appearance you will require:
- Transition shade (a light neutral, most often matte beige or taupe)
- Intermediate (medium brown or grey shade)
- Dark color (black, charcoal or dark espresso)
- Enhance shade (champagne, ivory or shimmer)
Step 3: Build the Transition Shade
Use your transition colour in your crease. Apply with a fluffy blending brush using a windshield-wiper technique.
The importance of this step:
- It establishes density.
- This makes the addition of darker colors afterward very easy.
- It is not harsh in lines.
This is the most important step in your smokey eye so do not rush in this part.
Step 4: The Mid-Tone is Added
Next, apply, moving slightly below the transition shade, your mid-tone shade. Concentrate on the crease and out corner. This makes it more defining and beginning to create the smokey effect.
- To be able to write in a precise manner use a little smaller brush to do so.
- Mix up to give no visible demarcation as that where the colors start blending.
Just remember to mix (blend colours together) – the colours are supposed to flow.
Step 5 Shade darker with the Dark Shade
Here is the drama! Take your darkest shadow- black, deep brown or charcoal- and put that on the outer corner of your eyelid, then blend inward.
- Load the colour with a flat brush and lightly place on the skin and then blur edges using a clean blending brush.
- Do not make inner corners too dark so as to seal off the eye.
For additional depth, you also may smudge the dark color on your upper and lower lash line.
Tip Trick: To avoid panda eyes, you should add the dark shade either gradually and not all at once.
Buy Premium products at: https://amzn.to/4mUbnam
Step 6: Strategic Emphasis
You do not want a smokey eye to be looking flat so highlight it.
- Put a shimmery champagne or pearl color of eye shadow on the inner corners of your eyes.
- Apply a little beneath the brow bone to lift.
This curbs the dark and causes your eyes to look larger and brighter.
Step 7: Line + Smudge
Eyeliner is a part of any smokey eye.
- Take a dark brown/black pencil liner then trace the upper lash line.
- Blot it with tiny brush or even cotton bud and get a smoky soft hint.
- Apply to the lower lash line as well to give additional depth.
On top of this you could add layers of liquid liner, softer on the edges this time.
Step 8: Top it off with Mascara (or Lashes!)
Eyelashes make the entire appearance. To make you eyes pop, apply two coats of volumising mascara.
To give it a boost of glamour, pop on some fake lashes, but do opt for something wispy that helps to add to the smokey aesthetic but not to overshadow it.
Bonus: Coordinate with the rest of your make up
The eyes are dramatic and therefore the rest of the look should be balanced:
- Match it with a nude or neutral lip.
- Leave cheeks soft with the slightest dab of bronzer or blush.
- Twinkle with a dab of attractor so it does not monopolize the limelight.
The most typical Smokey Eye Errors (and the ways to avoid them)
Even trained make-up enthusiasts will do several things wrong. The most typical of them can be dodged as follows:
-
Not mixing it well enough → The harsh lines should always be diffused by a clean brush.
-
A lot of black mass at one time is too much → Build up slowly to be in control.
-
Missing primer Applying primer → Causes creasing and fading.
-
Omitting lower lash line→ Makes the look incomplete.

Final Thoughts
The smokey eye has been able to outlive the sands of time due to the simple fact that, it fits everyone, it is highly versatile and can be used to make a statement. Choose the light brown and smokey eye everyday or go dark and bold with your evening smokey eye but the process is unanimous; prep, layer, blend, and highlight.
The secret to one flawless smokey eye is the proper products and a tab bit of patience, and then you will be able to make it look good every time.